
Your first clip, start to finish
You need one thing to start: an audio file. No lyrics, no idea, no characters — those help, but the studio will fill them in. Fifteen minutes of your attention is enough; the render queue then works on its own and you can close the tab.
One note before we start: the left navigation rail is still in Russian while the rest of the interface is translated. The step names are, in order: story, characters, tracks, storyboard, animation, final cut.
The 120 credits, honestly
The free plan gives you 120 credits. Credits are the unit of work — the counter sits in the top bar and says *credits left*.
On the free plan a scene costs 4 credits: 2 for the pair of frames and 2 for the Grok animation. A three-minute track is cut into roughly 30 scenes.
> 30 scenes × 4 credits = 120 credits.
That is the whole balance, to the credit. The free plan does deliver one full three-minute clip, but there is no slack in it. Everything below is written around that fact.
Two things cost nothing and are worth knowing early:
- Text steps are free. The story and the cutting of the track into scenes
cost 0 credits. Regenerate them as often as you like.
- Redrawing a frame is free. Once a scene has been paid for, redrawing its
first or last frame costs nothing at all. This is the lever that makes 120 credits workable: get all the frames, fix them until they are right, and only then spend on animation.
What does cost extra: the storyboard sheet (2), a generated character model sheet (2), and re-animating a scene that already has video (2 on Grok).
If this is your first run, use a track of two to two and a half minutes. That is 20–25 scenes, 80–100 credits, and it leaves you 20–40 credits to fix whatever goes wrong. A three-minute track leaves you nothing.
The route
1. Make a project
Top bar → + project. Give it a name, pick Single for one track, and skip the cover. You are now in the studio.
2. Add the track
Open the Tracks panel → + add track.
- Track title — anything.
- Clip style (1–3 presets, the first one is the base) — tick one to start
with. The first preset you tick carries the look; the others tint it. If you are unsure, one preset is a perfectly good answer.
- Lyrics — optional. An instrumental works.
- Comment: what you meant, the context — this is the field that matters most
when there are no lyrics. One or two sentences about what the clip is about.
Press Add track, then upload the file into the Audio field on the track card and press Save track.
!The setup stage: style chips, audio, comment and checkboxes
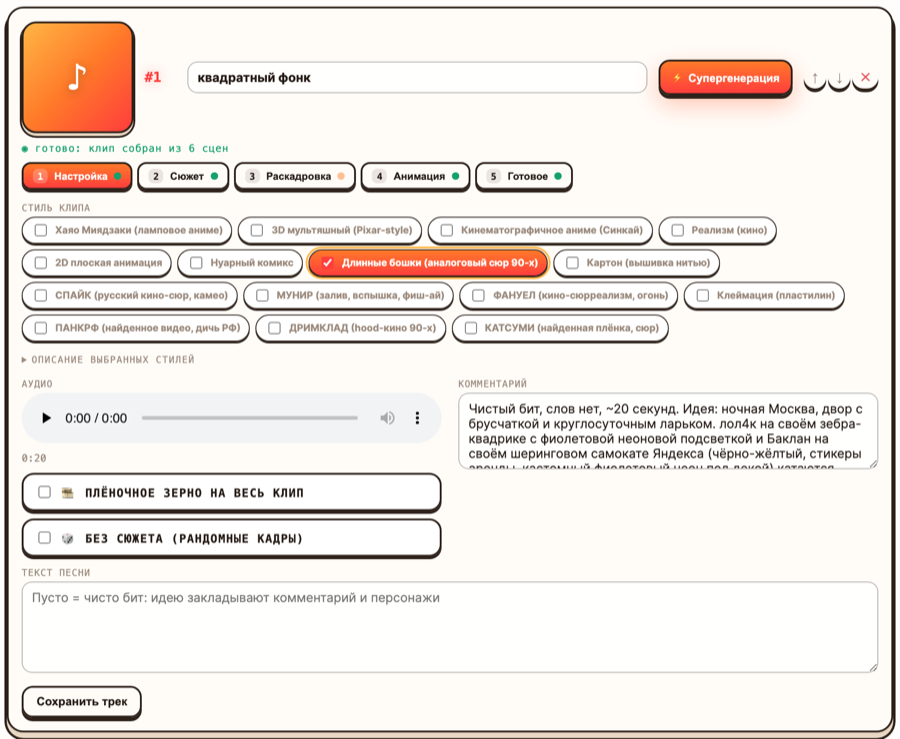
Two checkboxes on that card:
- film grain over the whole clip — leave it on if your style is one of the
analogue ones. It costs nothing and it is applied once at the end.
- no story (random punch frames) — turns the storyboard into independent
punch frames built from your comment, with no story arc. Good for a mood piece, wrong for anything with a narrative.
3. Add one character
Open Album characters → + add character, give a name, and fill in Personality and looks. That text goes into the prompts word for word, so write it like a description, not like a wish: *short, mid-thirties, shaved head, grey tracksuit, always squinting.*
Then either + reference photo to upload your own images — free — or Generate model sheet, which draws a four-angle turnaround and costs 2 credits. On a tight balance, upload a photo.
!Character card: description of the looks, reference photos and attributes
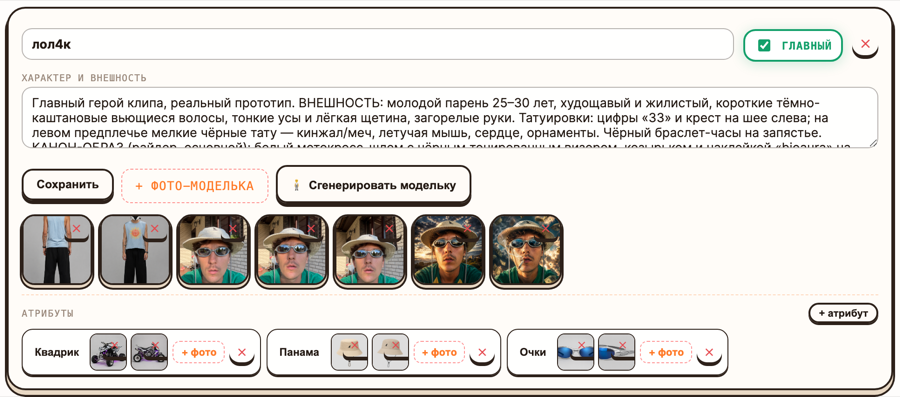
Characters belong to the project, not to one track: set them up once and they carry across every track in the album.
4. Write the story
Open Character & story → Write the story from all tracks. This is free. It reads your tracks and produces the arc that the storyboard will follow. Skip it only if you ticked *no story*.
5. Cut the track into scenes
Back on the track card: Generate storyboard. Free. The model reads the length and the structure of the audio and cuts it into scenes with timecodes, shot sizes and camera moves — the beat decides where the cuts fall, not an even grid.
You now have a strip of scene cards. Read through them before spending anything. Scene text is free to edit and free to regenerate.
There is also Generate sheet, which draws the whole storyboard as one sketch page, and Split the sheet into frames, which turns each cell of that page into the first frame of its scene. The sheet costs 2 credits. It is a good tool and it is worth skipping on your first free run.
!The storyboard stage: the sketch sheet and the strip of scene cards
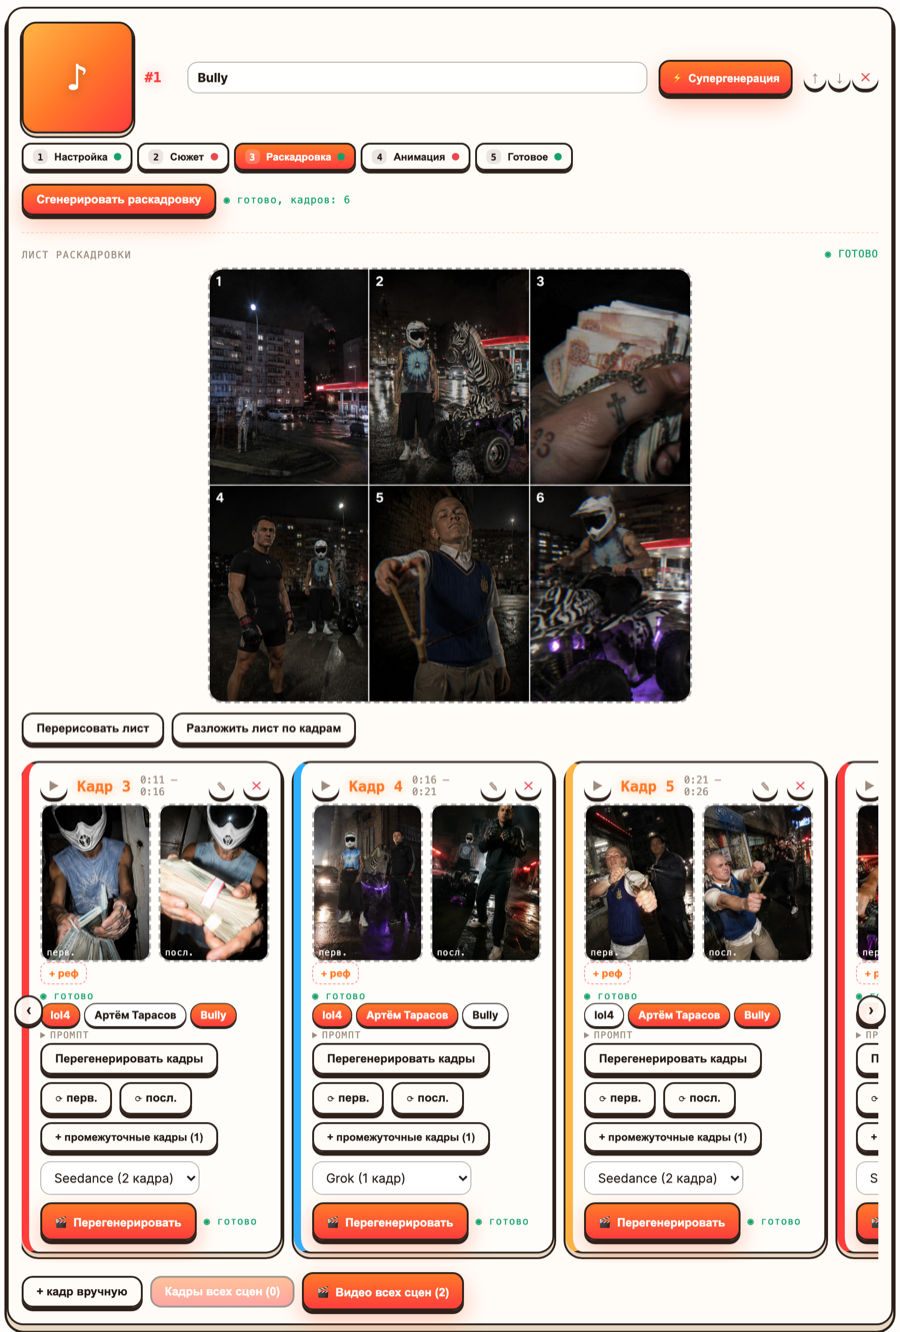
6. Draw the frames
Generate frames for all scenes. This is where the money starts: 2 credits per scene. The queue runs one scene at a time and survives a closed tab.
When it finishes, go through the strip. Any frame you do not like:
- ⟳ first rebuilds only the first frame, the last one stays.
- ⟳ last rebuilds only the last frame.
- Regenerate frames rebuilds both.
All three are free once the scene has been paid for. Use them. This is the step where a clip is actually won or lost, and it costs nothing.
7. Animate
Animate all scenes. Another 2 credits per scene. On the free plan the engine is Grok, which animates the first frame of each scene — the last frame is not used for motion here. It is still worth having a decent last frame: paid engines interpolate between the two, and if you upgrade later the same storyboard works.
8. Assemble
Tick use in clip on the scenes you want, or turn on auto-assemble and every new scene video will go into the clip on its own. Then Assemble clip — free — and download.
!The final stage: the assembled clip and the grid of every scene video
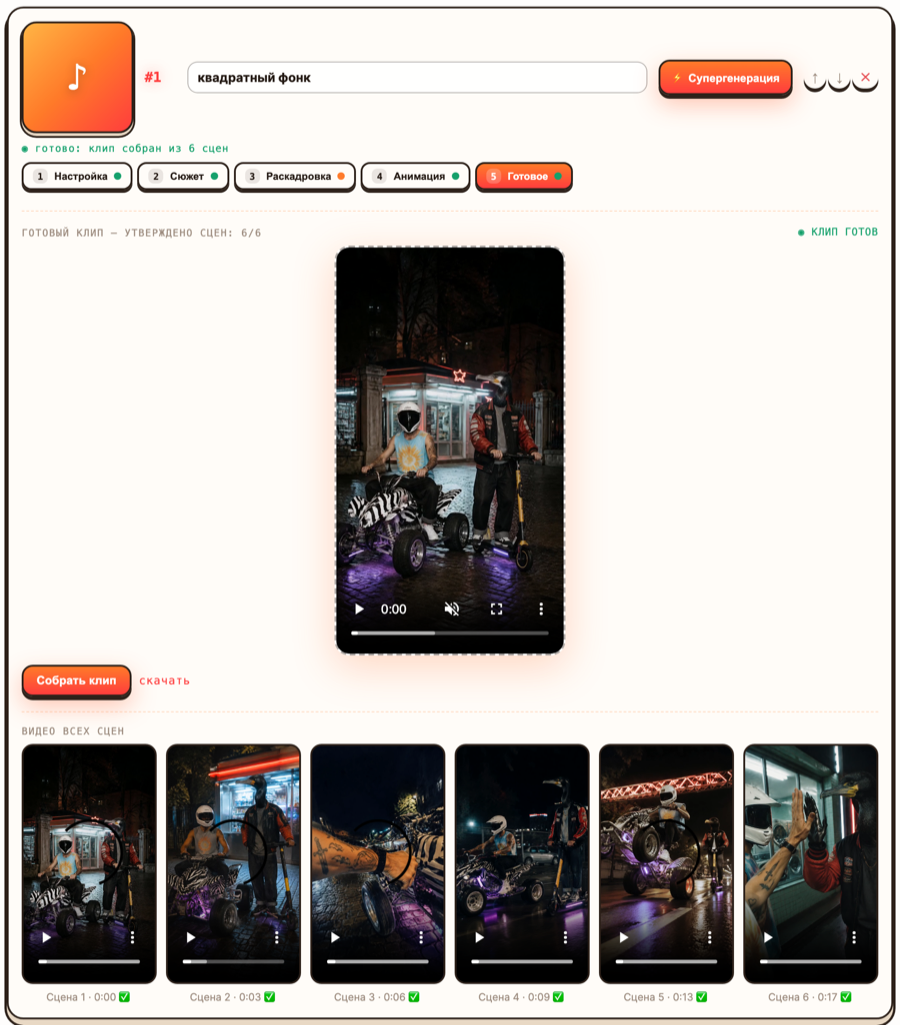
The output is 1080×1920, 30 fps, H.264 with your own audio: ready for Reels and Shorts with no reframing.
Three ways to lose the free plan
Spending on optional images. A generated character model sheet is 2 credits and a storyboard sheet is another 2. On a three-minute track that is your last scene gone: the run stops with *not enough credits* somewhere around scene 29. Upload a reference photo instead, and skip the sheet.
Pressing ⚡ One-click clip first. It runs the whole pipeline — story, storyboard, frames, video, assembly — and it charges for all of it up front, based on the length of the track. It also approves every scene automatically. It is a good button when you have credits to spare; on the free plan it spends your entire balance without ever letting you redraw a frame for free. It also refuses to start unless the track has audio, a style and at least one named character.
Re-animating instead of redrawing. Redrawing frames is free; generating video for a scene a second time costs the video price again — 2 credits per scene on Grok. If a scene is wrong, fix the frame first and animate once.
When it is done
You will have a vertical mp4 and, if you used a shorter track, some credits left. Watch it once through without touching anything, then read It came out bad: the usual causes — most first clips have two or three of the problems on that list, and all of them are cheap to fix at the frame stage.