
Assembly: grain, 9:16, the finished file
Assembly is the cheapest step in the studio — it costs nothing and you can run it as often as you like. It is also where a decent set of scenes turns into a clip or into a slideshow, so it is worth understanding what it actually does.
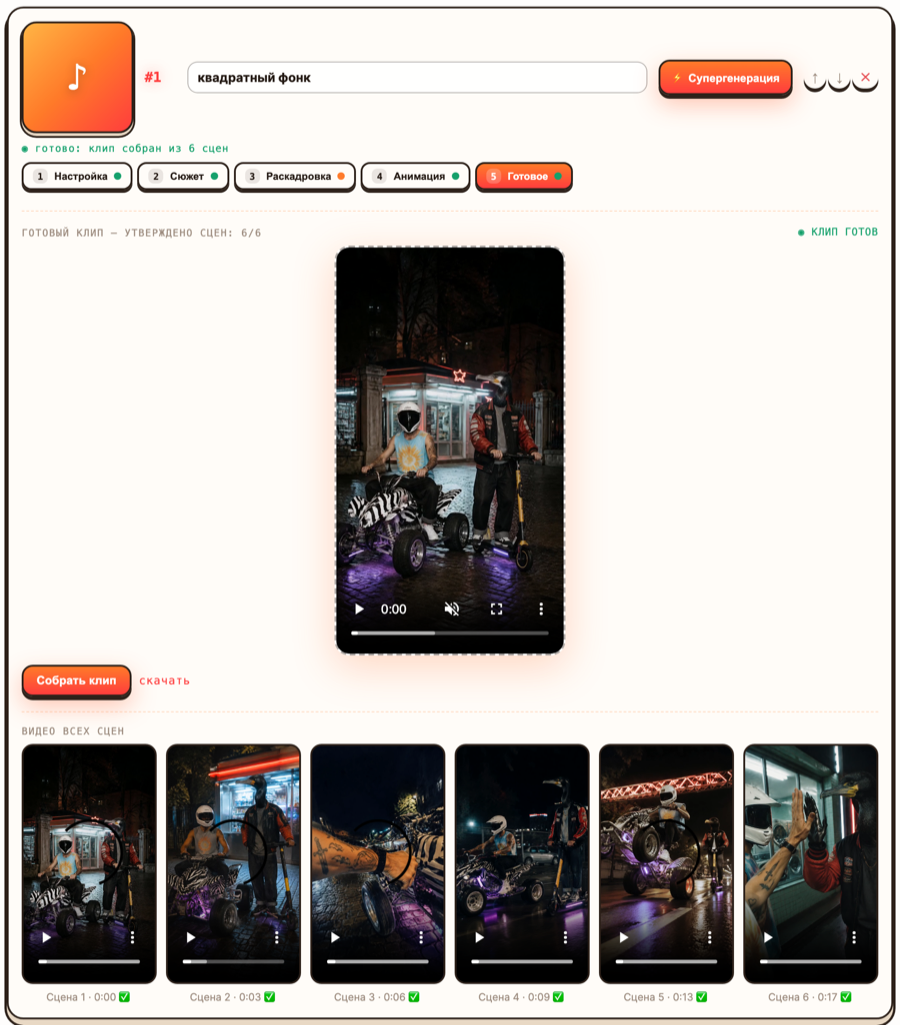
!The final stage: the assembled clip and the grid of every scene video
What goes in
Only scenes with use in clip ticked, in scene order. A scene needs video before it can be approved.
auto-assemble is a checkbox on the track card. With it on, every new scene video is approved and dropped into the clip on its own, and the clip is rebuilt — you never press the button. It is the right default while a clip is still being generated: you watch the thing take shape instead of waiting for the end.
One detail that matters: auto-assemble only touches *new* videos. A scene you deliberately unticked stays unticked. It will not quietly come back.
Assemble clip builds it by hand; Reassemble rebuilds after you change approvals. Then download gives you the file.
What comes out
Every scene is normalised before the join, because the engines return different sizes — a Grok scene and a Seedance scene are not the same shape.
- 1080×1920, vertical 9:16
- 30 fps
- H.264, high quality, in an mp4
- AAC audio at 192 kbps — your own track, laid over the joined video
Scenes are scaled to fit, never cropped. If a scene video is not 9:16 it is centred and padded with black rather than having its edges cut off. That is the safe default, but it does mean black bars can appear in the middle of an otherwise full-frame clip if one scene came back in the wrong shape. If you see bars, re-animate that one scene rather than accepting them.
Why your clip is shorter than your track
The join uses whichever runs out first, the video or the audio.
So: if you approved twenty scenes of six seconds, you get a two-minute clip and your three-minute track is cut at two minutes. The audio does not fade — it stops.
This is almost always what you want during production, and almost never what you want in the final export. Before you download, check that the approved scenes cover the track: the scene strip shows the timecode of each scene, and the last one should land near the end of the song.
The same arithmetic in reverse: if you edited scene durations and the total now exceeds the track, the extra video is cut off at the end of the audio.
Film grain
The checkbox is film grain over the whole clip. It does three things at once:
- adds live grain that moves between frames, the way film grain does — a still
noise layer looks like a dirty lens, not like film;
- lifts contrast very slightly;
- pulls saturation down a touch.
That combination is what reads as "shot on 16 mm" rather than "a filter". It is applied while the scenes are normalised, in one pass, at no cost.
When to leave it on: any of the analogue styles — DREAMCLAD, KATSUMI, PUNKRF, MUNIR, Long heads — and photoreal cinema. Grain is a large part of why those styles read as footage rather than as generated images.
When to turn it off: flat 2D animation and anything with large areas of flat colour, where grain becomes visible dirt rather than texture. Claymation is a judgement call; the miniature-set look survives grain well.
You can toggle it and reassemble as many times as you like. Nothing is redrawn, so it costs nothing to compare.
The pass before you publish
Watch the whole thing once, in silence, on a phone-sized window. Then:
Cuts that stutter. Two adjacent scenes with near-identical framing read as a glitch rather than a cut. Fix it by changing the shot size of one of them and redrawing — free — or by deleting one.
A scene that is a second too long. Shorten the scene duration and re-animate that scene only.
A dead opening. The first two seconds decide whether anyone watches the rest. If your clip opens on an establishing shot, consider promoting a punchier scene to the front — scenes can be reordered, and reassembly is free.
Black bars. See above: one scene came back in the wrong shape.
Everything the same size. The most common flaw in an assembled clip, and the cheapest to fix. Vary shot sizes across the strip; the frames are free to redraw.
The file
The download is a normal mp4 that needs nothing done to it. It goes straight into Reels, Shorts and TikTok with no reframing, no bars and no re-encode.
Where to put it, and what each platform does to it, is the next lesson: Publishing a vertical clip.